6.POPサーバ(Dovecot)のインストール・設定
クライアントからメールソフトを使ってメールを取得するため、POPサーバをインストールする。今回はCentOS 4が標準採用している、POPとIMAPの両方に対応し、かつ、導入が比較的簡単なDovecotを使用する。
6-1 インストール
次のコマンドを実行し、Dovecotをインストールする。
# yum -y install dovecot
6-2 設定
Dovecotの設定ファイル /etc/dovecot.conf をviで開き、設定を行う。
- プロトコルの指定:利用する受信サーバのプロトコルを「imap」「imaps」「pop3」「pop3s」から指定する。複数のプロトコルに対応させるには、スペースに続けて指定する。
protocols = pop3
- メールボックス形式の指定:mbox形式、Maildir形式で、設定が変わる。
default_mail_env = mbox:/var/mail/%u ←mbox形式の場合
default_mail_env = maildir:~/Maildir ←Maildir形式の場合
6-3 起動
- 設定が終わったら、Dovecotを起動する。また、サービスに登録する。
# chkconfig dovecot on
# /etc/rc.d/init.d/dovecot start
- 起動したら、プロセスが動いているか確認する。「実行中」と出れば、とりあえずOK。
# /etc/rc.d/init.d/dovecot status
dovecot (pid 29606) を実行中...
6-4 ポートを空ける
CentOS 4インストール時、ファイアウォールの設定においてSSHとSMTPしかポートを空けていない。このままではPOPが通らないので、POPが利用するポート「110」を空ける(IMAPなら「143」)。
ファイアウォールの設定ファイル /etc/sysconfig/iptables をviで開き、次の行を追加して保存する。
-A RH-Firewall-1-INPUT -m state --state NEW -m tcp -p tcp --dport 110 -j ACCEPT
追加後、ファイアウォールを再起動する。
# /etc/rc.d/init.d/iptables restart
6-5 統合認証方式の選択
DovecotがPAM経由でActiveDirectoryに対して認証するように設定を行う。Dovecotの設定ファイル /etc/pam.d/dovecot をviで開き、全ての行をコメントアウトしてから、次の行を追加する。
※PAMは設定ファイルを保存しただけで、変更が有効になる。
6-6 動作確認
クライアントPCのメーラーを設定し、メールが送受信できるかどうか確認する。ここでは、Outlook Expressを使って説明する。
1 メールアカウントの作成
Outlook Expressでアカウントを次のように作成する。
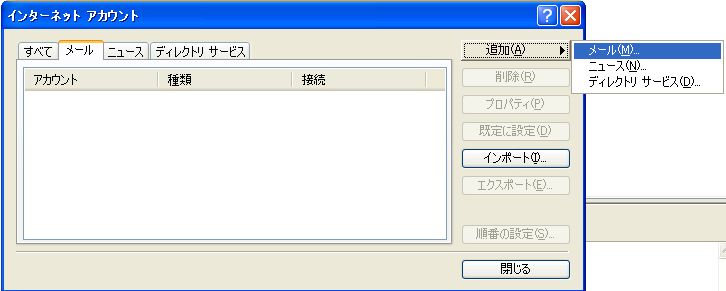
 | 「追加」ボタンをクリックし、「メール」をクリック |
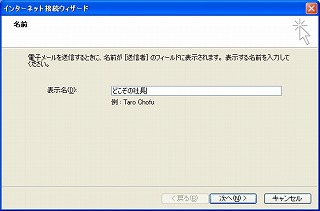 | 適当な名前を入力し、「次へ」をクリック |
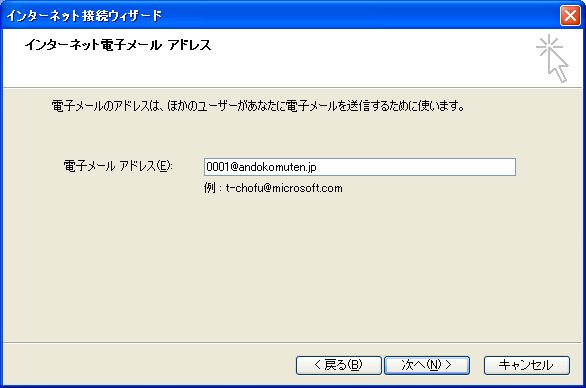
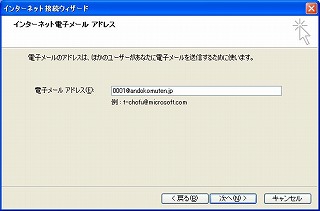 | ActiveDirectory側に作成したユーザアカウント名を、ドメイン名付き(例、0001@andokomuten.jp)で入力し、「次へ」をクリック |
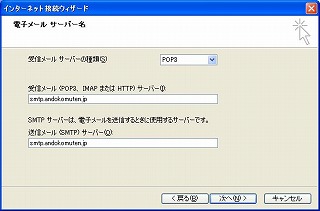 | プロトコルが「POP3」になっていることを確認し、POPサーバー、SMTPサーバーにそれぞれメールサーバのホスト名(例、smtp.denpa.jp)を入力して、「次へ」をクリック |
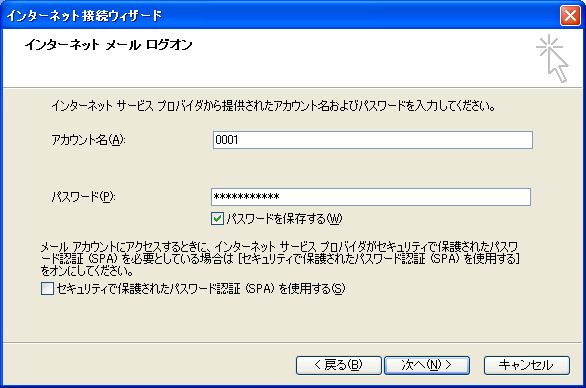
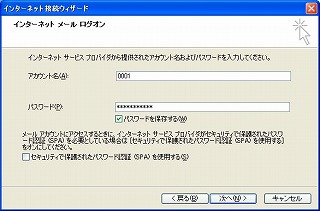 | 登録したアカウントのパスワードを入力し、「次へ」をクリック |
 | 「完了」をクリック |
2 認証テスト
アカウントを作成したら、Outlook ExpressからPOP経由でメールサーバに接続できるかテストを行う。何もメールを作っていない状態で「送受信」ボタンをクリックする。何のエラーも表示されなければ、とりあえず認証はうまくいっている。
パスワードを何回も聞かれて、接続できない場合、/var/log/maillogを確認する。例えば以下のようなメッセージが出ていたら、ドメインコントローラとメールサーバの時間がずれているために認証が失敗している。
*** ** **:**:** smtp dovecot-auth: pam_krb5[32615]: authentication fails for '0001' (0001@ANDOKOMUTEN.JP): Authentication failure (Clock skew too great)
*** ** **:**:** smtp pop3-login: Disconnected [::ffff:192.168.1.***]
メールサーバの時刻をセットしなおしたのち、再度試せば、今度は接続できるはずである。
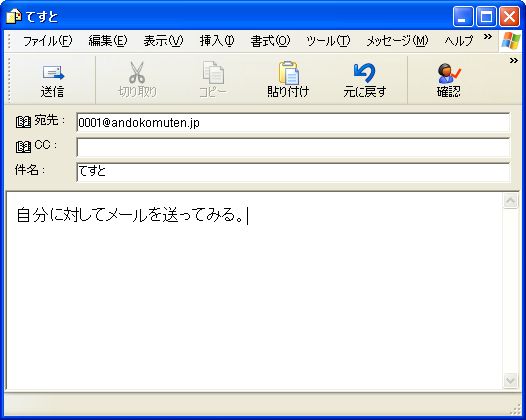
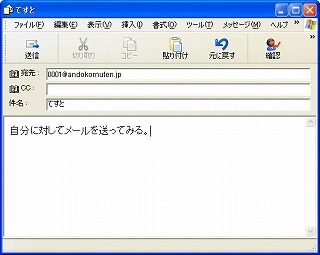
3 メール送信テスト
Outlook Expressを使って自分自身にメールを送ってみる。
すると、送信はできるが受信ができないことが分かる。
これは、メールサーバ側にアカウント用のホームディレクトリが存在しない(ls /home で確認してみよう)ためにメールボックスを作成できず、送信メールが保存されないことが原因である。
6-7 Autodirのインストール
元々、メールサーバ側にアカウントを作成したくないがためにActiveDirectoryを利用することを考えているのに、ActiveDirectoryに登録したアカウントごとにホームディレクトリを作成するのは美しくない。
そこで、勝手にホームディレクトリを作成してくれる Autodir というソフトをインストールし、起動させる。
- Autodirの入手:Autodirのサイト(http://www.intraperson.com/autodir/)にアクセスし、最新のソースファイルをダウンロードする。
RPM版もあるが、バージョンが古いのでソースファイルを使おう。
- インストール:ダウンロードしたソースファイルを解凍し、インストールする。
# tar zxvf autodir-0.99.8.tar.gz
# cd autodir-0.99.8
# ./configure
# make
# make install
./configureで「libltdl not found」というエラーで止まったら、以下を実行してlibltdlをインストールする。
# yum -y install libtool-ltdl libtool-ltdl-devel
- 設定:設定ファイルや起動スクリプトを準備する。0.99.3には用意されていた(misc/init.scripts内)のだが、0.99.8には何故か無くなっているので、0.99.3のものを拝借。
/etc/sysconfig/autohome
# Where home directories are supposed to be?
# Usually it is /home on most systems.
AUTOHOME_HOME=/home

# How long to wait in seconds
# before it is assumed home directory
# is inactive and unmounted.
#
# Servers like IMAP/POP access home directories every 10min
# in most configurations -- client side default mail check duraion.
# Therefore it is beter to make it 11min in this situation.
#
# If your site has different requirements, change according to that.
AUTOHOME_TIMEOUT=660

# Authome module path
AUTOHOME_MODULE="/usr/lib/autodir/autohome.so"

# realpath => path where real home directories should reside
# level    => Default value is ok for almost all sites. See Autodir-HOWTO
# skel     => Location of skel files. absolute path is expected
# noskel   => Don not copy skel files to home directories
AUTOHOME_OPTIONS="realpath=/autohome,level=2,skel=/etc/skel"

# If you desire backup feature and you know what this feature is, then uncomment it!
# Full path to program as well as arguments.
# %x characters are replaced with appropriate values.
# Following is just example. Do not use it as is!
# See Autodir-HOWTO for further info.

#AUTOHOME_BACKUP="'/bin/tar cf /tmp/%N.tar.gz %L'"

# How long to wait after a home directory is unmounted
# to start backup. Value expected in seconds and can not exceed one day.

#AUTOHOME_BACKWAIT=600

# Backup priority. 1 to 40 inclusive. Smaller value means higher priority.

#AUTOHOME_BACKPRI=30

# Max backup program execusions not to exceed at any givne time.

#AUTOHOME_MAXBACK=150
/etc/rc.d/init.d/autohome
#!/bin/sh
# chkconfig: - 28 72
# description: \
#	Autodir is for creating directories transparently to the applications
#	accessing them  based on available information from
#	sources like password database, group database.
#
#	Autodir depends on linux autofs kernel module to transparently detect
#	directory requests and create them on demand.
#
#	This invocation loads autohome module which handles home directories
#
# config /etc/sysconfg/autohome
#
#

CONFIG=/etc/sysconfig/autohome

# Source function library.
. /etc/init.d/functions

RETVAL=0

start() {

	# If autofs old module is loaded unload it now
	grep -q -w autofs /proc/modules || \
		/sbin/rmmod autofs 1> /dev/null

	# If module is not loaded load it now
	grep -q autofs4 /proc/modules || \
		/sbin/modprobe -k autofs4 1> /dev/null

	# See if autofs module actually loaded
	grep -q -w autofs4 /proc/modules
	if [ $? -ne 0 ]
	then
		RETVAL=1;
		return $RETVAL
	fi

	echo -n $"Starting up autohome daemon: "

	test -r "$CONFIG" && . "$CONFIG"
	daemon /usr/sbin/autodir -d $AUTOHOME_HOME -m $AUTOHOME_MODULE \
		${AUTOHOME_OPTIONS+"-o $AUTOHOME_OPTIONS"} \
		${AUTOHOME_TIMEOUT+"-t $AUTOHOME_TIMEOUT"} \
		${AUTOHOME_BACKUP+"-b $AUTOHOME_BACKUP"} \
		${AUTOHOME_BACKWAIT+"-w $AUTOHOME_BACKWAIT"} \
		${AUTOHOME_BACKPRI+"-p $AUTOHOME_BACKPRI"} \
		${AUTOHOME_MAXBACK+"-c $AUTOHOME_MAXBACK"} \
		-l /var/run/autohome.pid

	RETVAL=$?
	[ $RETVAL -eq 0 ] && touch /var/lock/subsys/autohome
	echo

	return $RETVAL
}

stop() {
	echo -n $"Shutting down autohome daemon: "
	killproc autohome
	RETVAL=$?
	[ $RETVAL -eq 0 ] && rm -f /var/lock/subsys/autohome
	echo
	return $RETVAL
}

dostatus() {
	local pid

	pid=`pidfileofproc autohome`

	if [ -n "$pid" -a -d "/proc/$pid" ]
	then
		echo "autohome (pid $pid) running..."
		return 0
	else
		echo "auotohome stopped"
		return 1
	fi
}

restart() {
	stop
	start
}

condrestart() {
	[ -e /var/lock/subsys/autohome ] && restart || :
}

# See how we were called.
case "$1" in
  start)
	start
	;;
  stop)
	stop
	;;
  status)
	dostatus
	;;
  restart|reload)
	restart
	;;
  condrestart)
	condrestart
	;;
  *)
	echo $"Usage: autohome {start|stop|status|restart|reload|condrestart}"
	exit 1
esac

exit $RETVAL
- 起動:起動スクリプトに実行権をつけ、Autodirを起動する。また、サービスに登録する。
# chmod 755 /etc/rc.d/init.d/autohome
# chkconfig --add autohome
# chkconfig autohome on
# /etc/rc.d/init.d/autohome start
ERROR: Module autofs does not exist in /proc/modules
Starting up autohome daemon: [ OK ]
Autodir起動時、妙なエラーが出るが気にしない(汗
6-8 もう一度確認
Outlook Expressでもう一度自分宛にメールを作成し、送受信してみる。今度は正常に、送信したメールが受信できるはずである。
また、ls /home でホームディレクトリを確認すると、メールアカウントのディレクトリが作成されていることが確認できる。